Why You’ll Love These Vanilla Cupcakes with Cinnamon Frosting
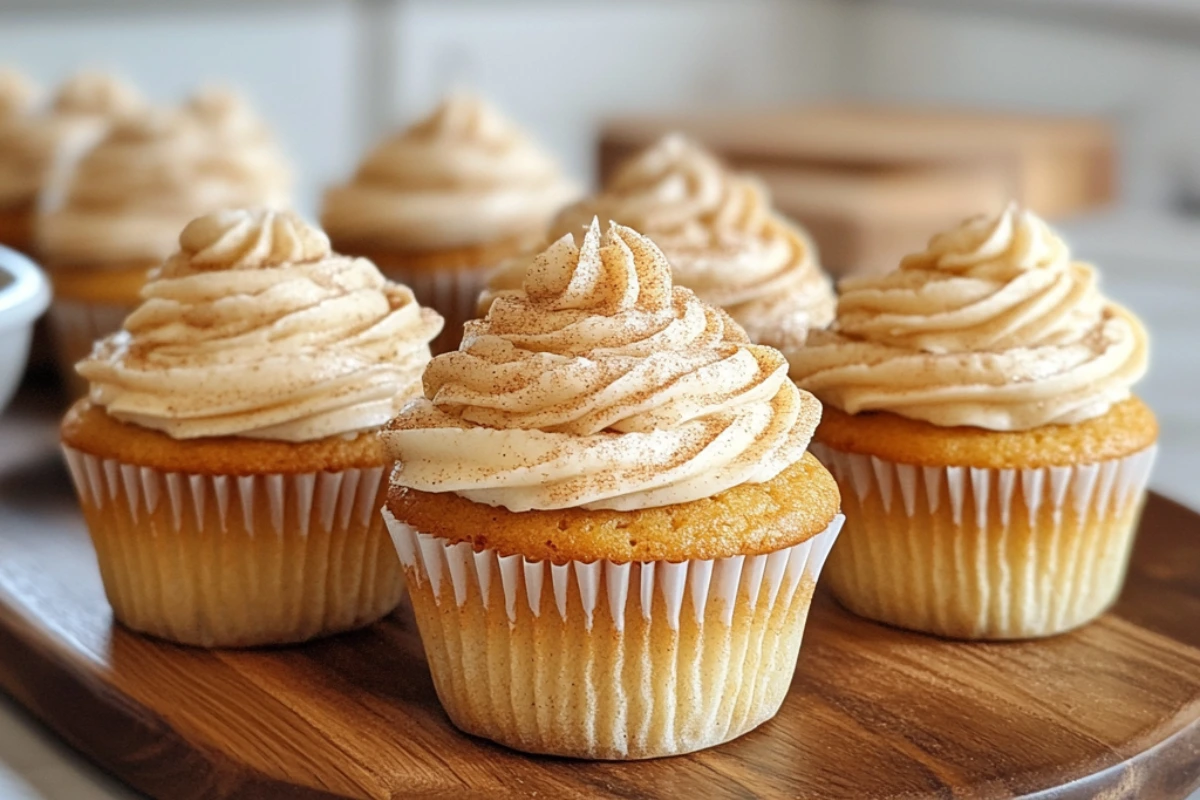
There’s something truly magical about a classic vanilla cupcake. Light, fluffy, and perfectly sweet, they are a timeless treat that never fails to impress. But what if we took it a step further? Imagine warm, spiced cinnamon frosting on top of a moist, buttery vanilla cupcake—a match made in dessert heaven! These Vanilla Cupcakes with Cinnamon Frosting bring the perfect balance of sweet and spice, making them ideal for any occasion, whether it’s a birthday, family gathering, holiday, or simply a cozy treat with a cup of coffee.
What sets this recipe apart? The secret is in the details—a combination of high-quality vanilla extract, room-temperature ingredients, and the perfect cinnamon-infused frosting that takes these cupcakes from great to unforgettable. The combination of rich vanilla essence, creamy butter, and warm cinnamon creates a heavenly flavor profile that pleases every dessert lover. Best of all, they are simple to make, require no fancy equipment, and can be easily customized to suit your taste preferences. If you love soft, bakery-style cupcakes with a touch of warm spice, this recipe is for you!
Why You’ll Love This Recipe
✔ Soft & Fluffy Texture: These cupcakes are light, moist, and perfectly tender, ensuring each bite is delightful.
✔ Easy to Make: A simple, no-fail recipe that even beginners can master without stress!
✔ Perfectly Balanced Flavor: Classic vanilla cupcakes with a warm cinnamon twist that adds an unexpected yet delightful flavor.
✔ Great for Any Occasion: Whether for a party, holiday, or casual treat, these cupcakes shine as the perfect homemade dessert.
✔ Customizable: You can switch up the frosting, add mix-ins, or make them gluten-free with a simple swap of ingredients!
✔ Ideal for Sharing: These cupcakes are perfect for potlucks, school events, or homemade gifts.
Ingredients Needed
For the Vanilla Cupcakes:
- 1 ½ cups all-purpose flour (for a perfect balance of structure and softness)
- 1 ½ tsp baking powder (ensures cupcakes rise beautifully)
- ½ tsp salt (enhances all the flavors)
- ½ cup unsalted butter, softened (adds rich, creamy flavor)
- ¾ cup granulated sugar (sweetens without overpowering)
- 2 large eggs (binds the ingredients and adds moisture)
- 1 tbsp pure vanilla extract (provides deep vanilla flavor)
- ½ cup whole milk (adds moisture and creates a tender crumb)
- ¼ cup sour cream (prevents dryness and enhances flavor)
For the Cinnamon Frosting:
- 1 cup unsalted butter, softened (creates a creamy, rich frosting base)
- 3 cups powdered sugar (for the perfect fluffy consistency)
- 1 ½ tsp ground cinnamon (adds warmth and spice)
- 2 tbsp heavy cream (or milk) (adjusts the frosting’s consistency)
- 1 tsp pure vanilla extract (complements the cinnamon beautifully)
- Pinch of salt (balances sweetness)
Equipment Needed
- Mixing bowls (to combine dry and wet ingredients efficiently)
- Electric mixer or stand mixer (for achieving a smooth batter and fluffy frosting)
- Muffin tin (for baking evenly sized cupcakes)
- Cupcake liners (makes cleanup easier and adds a bakery-style look)
- Piping bag & star tip (for frosting) (creates beautifully piped swirls of frosting)
- Cooling rack (allows cupcakes to cool properly before frosting)
Step-by-Step Instructions
1. Prepare the Cupcake Batter
Preheat the oven to 350°F (175°C) and line a 12-cup muffin tin with cupcake liners. In a medium bowl, whisk together the flour, baking powder, and salt to ensure the leavening agents are evenly distributed.
2. Cream the Butter & Sugar
In a separate bowl, beat the butter and sugar together until light and fluffy (about 2-3 minutes). This step incorporates air into the batter, giving the cupcakes a light texture. Add the eggs, one at a time, mixing well after each. Stir in the vanilla extract, which enhances the overall flavor profile.
3. Combine Wet & Dry Ingredients
Gradually mix in the dry ingredients, alternating with the milk and sour cream, beginning and ending with the dry ingredients. Mix until just combined—do not overmix! Overmixing leads to dense cupcakes instead of light and airy ones.
4. Bake the Cupcakes
Divide the batter evenly among the cupcake liners, filling each about 2/3 full. Bake for 18-22 minutes or until a toothpick inserted in the center comes out clean. Allow cupcakes to cool in the pan for 5 minutes, then transfer them to a wire rack to cool completely before frosting.
5. Prepare the Cinnamon Frosting
In a large bowl, beat butter, powdered sugar, and cinnamon until smooth and fluffy. Add vanilla, cream, and a pinch of salt, beating until light and creamy. If the frosting is too thick, add a small amount of milk until the desired consistency is reached.
6. Frost the Cupcakes
Transfer the frosting to a piping bag fitted with a star tip and swirl onto the cooled cupcakes. Sprinkle with a dash of cinnamon or a light drizzle of honey for a beautiful finishing touch!
Pro Tips for Perfect Cupcakes
- Always use room temperature ingredients for the smoothest batter.
- Be sure to measure flour correctly by spooning and leveling it, rather than scooping directly.
- Let cupcakes cool completely before frosting to prevent melting.
- Sift the powdered sugar before making frosting for a silky smooth texture.
Nutritional Information (Per Cupcake with Frosting)
- Calories: ~320 kcal
- Carbohydrates: 40g
- Fat: 16g
- Protein: 3g
- Sugar: 28g
(Nutritional values may vary based on modifications.)
Common Mistakes & How to Avoid Them ❌➡✅
When making this recipe, certain common mistakes can affect the final result. One of the biggest mistakes is overfilling tortillas, which causes them to tear or prevent them from sealing properly. To avoid this, ensure you use just enough filling so that the tortillas can roll tightly without breaking. Another mistake is using store-bought shredded cheese instead of freshly grated cheese.
Pre-shredded cheese contains anti-caking agents that prevent it from melting smoothly, leading to a grainy texture. Always opt for freshly grated cheese for the best melt and consistency. Another common issue is not rolling the tortillas tightly enough, which can cause them to unravel while baking. Rolling them snugly and placing them seam-side down on the baking sheet ensures they hold their shape.
Additionally, baking at the wrong temperature can cause the dish to dry out or not cook evenly. It is essential to preheat the oven correctly and use a consistent temperature for even cooking. Lastly, using low-quality tortillas can lead to cracking and breaking. Opt for fresh, pliable tortillas and consider slightly warming them before rolling to prevent any tears.
Health Benefits of This Recipe 🥦
This recipe is not only delicious but also offers several health benefits, especially for those following a low-carb or keto lifestyle. The primary ingredients are rich in healthy fats and protein, making them a great option for those looking to reduce their carbohydrate intake while still enjoying flavorful meals. The cheese used in this dish is a good source of calcium and protein, supporting bone health and muscle maintenance.
Additionally, choosing high-quality, whole-food ingredients over processed store-bought versions ensures that you avoid unnecessary preservatives, additives, and excess sodium. Homemade meals like this are not only healthier but also allow you to control the ingredients and portion sizes, making it easier to adhere to dietary preferences. If using low-carb tortillas, you can further reduce carb intake while still enjoying a satisfying meal.
The inclusion of spices and herbs in the filling also provides antioxidants and anti-inflammatory benefits, contributing to overall wellness. By making this dish at home, you ensure a nutritious, fresh, and wholesome meal without compromising on taste.
Ingredient Spotlight 🌟
One of the standout ingredients in this recipe is cheese, which plays a crucial role in both flavor and texture. Cheese is an excellent source of high-quality protein and calcium, making it beneficial for bone health and overall well-being. It also contains healthy fats, which help in keeping you full and satisfied, making it an ideal choice for low-carb and keto diets. When selecting cheese for this recipe, it’s best to go for natural, full-fat options rather than processed cheese, as they contain fewer additives and better nutritional value.
If you’re looking for an alternative to dairy-based cheese, nut-based cheeses such as almond or cashew cheese can be great substitutes while still providing a creamy texture. Those watching their sodium intake can opt for low-sodium cheese varieties to make the dish more heart-friendly. The right choice of cheese can significantly enhance the richness and depth of the dish, making it a flavorful and satisfying meal without the need for artificial ingredients.
How to Make This Recipe Kid-Friendly 👶
If you want to make this recipe more appealing for children, there are a few simple modifications that can make a big difference. Kids often prefer milder flavors, so using a mild cheese like mozzarella or Monterey Jack instead of sharp cheddar or spicy cheese varieties can make the dish more palatable for younger taste buds.
Additionally, cutting the roll-ups into smaller bite-sized pieces makes them easier for kids to eat and enjoy. Another great way to make it more exciting for kids is by offering fun dipping sauces, such as a mild ranch dressing, sour cream, or a homemade yogurt-based dip. This not only adds extra flavor but also makes mealtime more interactive. If your child enjoys a little extra crunch, consider adding finely diced vegetables like bell peppers or zucchini to the filling for added nutrition.
To make this a fun, hands-on activity, let kids participate in the kitchen by helping to roll the tortillas or sprinkle cheese—they will love being part of the cooking process, making them more likely to enjoy the final dish!
How to Pair This Dish with Other Low-Carb Foods 🍽️
Pairing this dish with the right side dishes can create a balanced, satisfying meal while keeping it low in carbohydrates. One of the best pairings is a fresh, crisp salad, such as a simple green salad with a light vinaigrette, which adds freshness and balances the richness of the cheese and tortillas. Roasted or grilled vegetables like zucchini, asparagus, or bell peppers also make excellent sides, adding both flavor and nutrients without excess carbs. If you’re looking for something heartier, consider serving this dish with a creamy cauliflower mash, which provides a similar comforting texture to mashed potatoes but with far fewer carbs.
For a refreshing drink pairing, unsweetened iced tea, infused water, or a light citrus spritzer can enhance the flavors without adding unnecessary sugars. Those following a strict keto diet may also enjoy pairing this with avocado slices or guacamole, which add creaminess and healthy fats to the meal. Choosing the right accompaniments ensures that the dish remains well-balanced and complements the main flavors perfectly.
FINAL THOUGHTS
This recipe is a fantastic option for those looking for a delicious, easy-to-make meal that is both satisfying and nutritionally balanced. By making small adjustments, such as choosing high-quality cheese, using fresh ingredients, and ensuring proper preparation techniques, you can elevate the flavors and texture to restaurant-quality levels.
Whether you’re making this for family dinners, meal prepping, or entertaining guests, it’s a reliable and customizable dish that fits a variety of dietary needs. Its versatility allows for creative variations, whether through different cheeses, alternative seasonings, or pairing it with complementary low-carb sides. Plus, by following the pro tips outlined above, you can avoid common mistakes and achieve perfectly rolled, crispy, and flavorful results every time.
Cooking at home not only allows for better control over ingredients and portion sizes, but it also makes the experience more enjoyable and rewarding. Try this recipe today, experiment with different flavors, and don’t forget to share your success with others!