
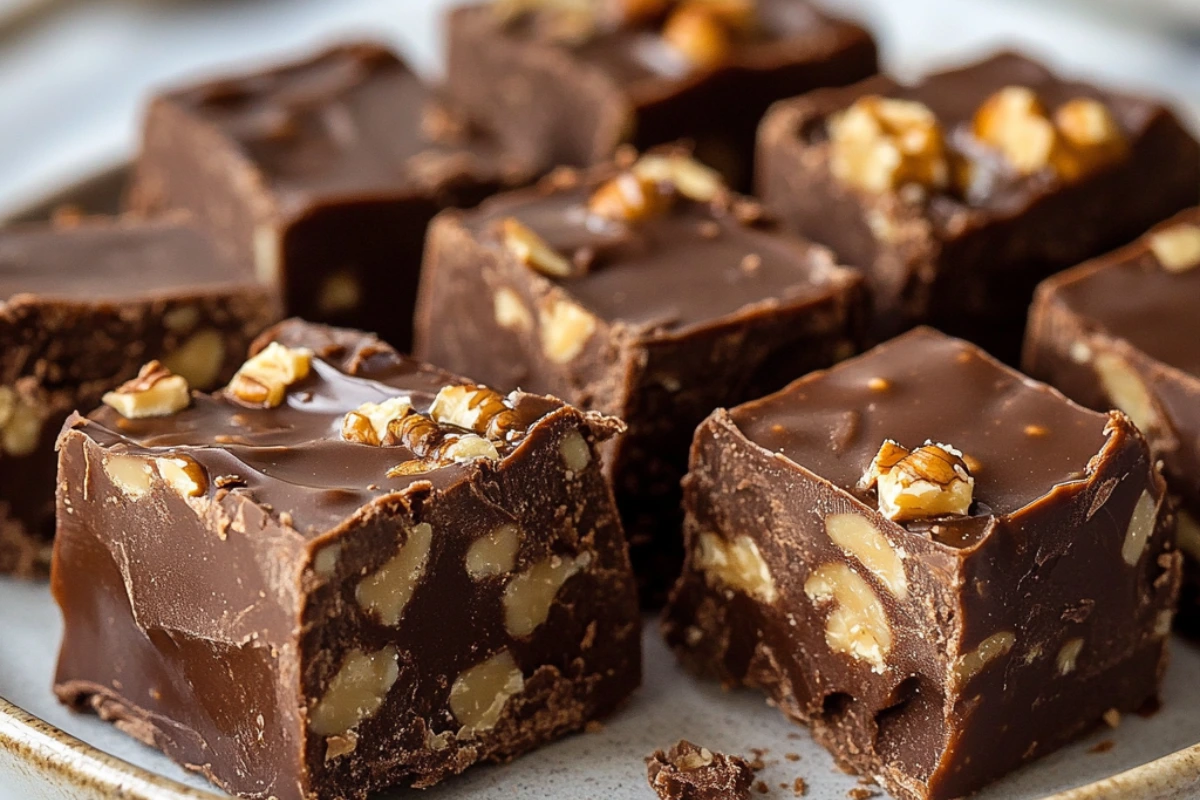
Few things in life compare to the decadent, melt-in-your-mouth goodness of homemade Chocolate Walnut Fudge. This recipe is the perfect balance of creamy, chocolatey richness and the delightful crunch of walnuts. Whether you’re making a batch for the holidays, a special occasion, or simply to satisfy your sweet tooth, this easy, foolproof recipe will quickly become a favorite in your household.
The best part? It requires minimal ingredients and no baking! You can whip up this old-fashioned classic in under 30 minutes and let it set in the fridge for a deliciously firm, yet smooth texture. Unlike store-bought fudge, this homemade version contains no preservatives and allows you to customize the flavors and texture to your preference. If you’re a chocolate lover, this is the ultimate treat to indulge in.
Why You’ll Love This Recipe
✔ Rich & Creamy Texture: Smooth, velvety chocolate fudge with crunchy walnuts for the perfect contrast.
✔ Easy & Quick: Made in under 30 minutes with simple ingredients—no oven required!
✔ Great for Gifting: Perfect for holidays, birthdays, or as a homemade gift.
✔ Customizable: Swap the nuts, add toppings, or try different chocolate varieties for endless flavor combinations!
✔ Budget-Friendly: Uses pantry staples, making it a cost-effective homemade dessert.
Ingredients Needed
- 2 cups semi-sweet chocolate chips (or dark chocolate for a richer taste)
- 1 can (14 oz) sweetened condensed milk (creates smooth texture)
- 4 tbsp unsalted butter (adds creaminess)
- 1 tsp vanilla extract (enhances the chocolate flavor)
- ½ tsp salt (balances sweetness)
- 1 cup chopped walnuts (adds crunch and depth)
Optional Add-ins:
- ½ tsp cinnamon (for a warm spice twist)
- ½ cup mini marshmallows (for a rocky road variation)
- Sea salt flakes (for a sweet-salty contrast)
Equipment Needed
- Medium saucepan (for melting chocolate)
- Heatproof mixing bowl
- Spatula (for stirring)
- 8×8-inch baking pan (for setting the fudge)
- Parchment paper (for easy removal)
Step-by-Step Instructions
1. Prepare the Pan
Line an 8×8-inch baking dish with parchment paper, leaving an overhang on the sides. This will make it easier to lift the fudge out once it sets.
2. Melt the Ingredients
In a medium saucepan over low heat, melt the chocolate chips, sweetened condensed milk, and butter, stirring constantly. Keep the heat low to avoid scorching the chocolate. Stir until the mixture is smooth and fully combined.
3. Add Flavor & Nuts
Remove the pan from heat and stir in vanilla extract, salt, and chopped walnuts. If you’re adding any optional ingredients like marshmallows or cinnamon, mix them in at this stage.
4. Pour & Set
Pour the fudge mixture into the prepared baking pan, spreading it evenly with a spatula. Smooth the top, and sprinkle additional walnuts or sea salt if desired.
5. Chill & Serve
Refrigerate the fudge for at least 2 hours or until firm. Once set, lift it out of the pan using the parchment paper, cut into squares, and enjoy!
Tips for the Best Results
🔥 Use high-quality chocolate for the richest flavor. Dark chocolate (70% cocoa) provides a deeper taste.
🔥 Don’t overheat the chocolate—low and slow is key to a smooth fudge.
🔥 Stir constantly while melting to prevent burning or seizing.
🔥 Let the fudge fully set in the refrigerator before cutting for clean slices.
🔥 Store properly in an airtight container to maintain freshness.
Variations & Customizations
🌿 Gluten-Free Option: This fudge is naturally gluten-free! Just ensure your chocolate chips are certified gluten-free.
🌶 Spicy Chocolate Fudge: Add ¼ tsp cayenne pepper for a Mexican chocolate twist.
🥥 Coconut Chocolate Fudge: Mix in ½ cup shredded coconut for added texture and flavor.
🍊 Orange Zest Fudge: Stir in 1 tbsp orange zest for a citrusy chocolate treat.
🥜 Peanut Butter Swirl: Swirl in 2 tbsp peanut butter before setting for a peanut-chocolate combo.
Serving Suggestions
🍽 With Coffee or Tea: A perfect match with a hot cup of coffee or chai tea.
🍓 With Fresh Berries: Serve alongside strawberries or raspberries for a fruity contrast.
🍨 With Ice Cream: Warm up a piece and serve it over vanilla ice cream for a rich dessert.
☕ Hot Chocolate Pairing: Enjoy a piece with a mug of homemade hot cocoa for a double chocolate experience.
Storage & Reheating Instructions
❄️ Refrigeration: Store in an airtight container in the fridge for up to 2 weeks.
🌡 Room Temperature: Can be stored at room temperature in a cool, dry place for up to 1 week.
❄️ Freezing: Freeze fudge for up to 3 months. Wrap tightly in plastic wrap and store in a freezer-safe container.
🔥 Reheating: If you prefer warm fudge, microwave a piece for 5-10 seconds until slightly softened.
Frequently Asked Questions (FAQs)
Q: Can I make this fudge without nuts?
A: Absolutely! Simply omit the walnuts, and you’ll have a smooth, creamy chocolate fudge.
Q: Can I use milk chocolate instead of dark chocolate?
A: Yes, but milk chocolate will make the fudge sweeter and softer. Adjust the sweetness as needed.
Q: What if my fudge is too soft?
A: Make sure it chills for at least 2 hours and store it in the refrigerator to keep it firm.
Nutritional Information (Per Serving – Approx. 1 Square)
- Calories: 180 kcal
- Carbohydrates: 15g
- Fat: 12g
- Protein: 2g
- Sugar: 12g
(Nutritional values may vary based on modifications.)
Call to Action (CTA)
Tried this Chocolate Walnut Fudge recipe? Leave a comment and rating below! Share your homemade fudge photos on Pinterest, Instagram, and Facebook using #HomemadeFudge. I’d love to see your delicious creations! 🍫✨
Useful Links 🔗
- Easy Chocolate Truffles – A bite-sized chocolate treat you’ll love.
- Classic Brownies – Want something chewy? Try these brownies!
- Peanut Butter Fudge – Another easy, no-bake fudge variation!
Common Mistakes & How to Avoid Them ❌➡✅
One of the most common mistakes when preparing this dish is overfilling the tortillas or using too much filling, which can make them difficult to roll and cause them to fall apart while cooking. To prevent this, use a measured amount of filling that allows the tortilla to wrap snugly without tearing.
Another frequent issue is using store-bought shredded cheese instead of fresh-grated cheese. Pre-packaged shredded cheese contains anti-caking agents that prevent it from melting smoothly, often resulting in a grainy texture rather than a creamy, gooey finish. For the best results, always opt for freshly grated cheese. Additionally, some people bake at the wrong temperature, leading to unevenly cooked tortillas—either too crispy or too soggy. To avoid this, ensure your oven is properly preheated, and place the tortillas on a lined baking sheet for even heat distribution.
Another pitfall is not rolling the tortillas tightly enough, which can cause them to unravel during baking or frying. Rolling them firmly and placing them seam-side down on the tray will keep them intact. Lastly, using low-quality tortillas can result in cracking or breaking while rolling. To avoid this, warm the tortillas slightly before assembling to make them more pliable and prevent breakage.
Health Benefits of This Recipe 🥦
This dish is an excellent option for those following a low-carb or keto lifestyle, as it prioritizes healthy fats, quality protein, and minimal carbohydrates. Cheese, which is a key ingredient, is an excellent source of calcium, protein, and essential fatty acids that contribute to bone health and muscle maintenance. Unlike processed store-bought versions, making this dish at home allows you to control the ingredients, avoiding excessive sodium, preservatives, and artificial additives.
Homemade meals also promote portion control, ensuring you consume a balanced amount of healthy fats and proteins without excess calories. Additionally, using high-quality protein sources supports satiety, helping reduce hunger and cravings. If you’re using a low-carb tortilla alternative, this dish can be completely keto-friendly, making it a fantastic choice for those monitoring their carb intake.
The combination of cheese and lean protein helps keep blood sugar levels stable, reducing spikes that can lead to energy crashes. Plus, adding fiber-rich vegetables like bell peppers, spinach, or zucchini can increase the fiber content, further enhancing digestion and overall health benefits.
Ingredient Spotlight 🌟
One of the star ingredients of this recipe is cheese, a fundamental component that provides flavor, texture, and nutritional benefits. Cheese is an excellent source of high-quality protein and calcium, which are essential for maintaining strong bones and muscles. The fat content in cheese also plays a role in satiety, helping you feel fuller for longer, which can be beneficial for weight management. Additionally, cheese contains conjugated linoleic acid (CLA), a compound known for its potential fat-burning properties and metabolic benefits. When selecting cheese, it’s best to opt for natural, full-fat varieties rather than processed cheeses, as they contain fewer additives and offer a richer, creamier taste.
If you’re looking for a dairy-free alternative, nut-based cheeses made from cashews or almonds can provide a similar creamy consistency while catering to different dietary needs. Those watching their sodium intake may also consider low-sodium cheese options to make the dish more heart-friendly. Whether you use classic cheddar, mozzarella, or a smoky gouda, choosing a high-quality cheese will elevate the overall taste and texture of this dish.
How to Make This Recipe Kid-Friendly 👶
To make this dish more kid-friendly, consider using milder cheese varieties such as mozzarella or Monterey Jack instead of sharp or spicy cheeses, which some children may find too strong. Additionally, cutting the roll-ups into smaller bite-sized portions makes them easier for little hands to pick up and enjoy. If your child enjoys dipping, you can serve them with fun and flavorful sauces such as mild salsa, ranch dressing, or a yogurt-based dip, making the meal more interactive and enjoyable. Another great way to introduce variety is by incorporating finely chopped mild vegetables like carrots, zucchini, or bell peppers, which blend well with the filling without being too overpowering.
You can also let your child participate in the cooking process by allowing them to sprinkle the cheese or help with rolling the tortillas, making them more engaged and excited about eating the final dish. If your child prefers a crispier texture, baking the roll-ups until golden brown can enhance their appeal. Overall, with a few simple modifications, this dish can become a family-friendly favorite that even the pickiest eaters will love.
How to Pair This Dish with Other Low-Carb Foods 🍽️
Pairing this dish with complementary low-carb side dishes enhances its nutritional value while keeping the meal balanced. One of the best pairings is a fresh green salad with a light vinaigrette, which adds a refreshing contrast to the rich, cheesy flavors. A side of roasted or grilled vegetables such as zucchini, asparagus, or bell peppers can provide extra fiber and nutrients without adding unnecessary carbs. If you’re looking for a heartier option, consider serving the roll-ups with a creamy cauliflower mash, which offers the comforting texture of mashed potatoes without the high carb content.
Another excellent pairing is avocado slices or guacamole, which add a creamy texture and boost the dish’s healthy fat content. For a warm and satisfying option, a bowl of broccoli cheese soup or a light tomato bisque can complement the dish without overpowering it. As for beverages, opt for unsweetened iced tea, infused water, or a keto-friendly lemon spritzer to enhance the flavors while keeping the meal light. By choosing the right accompaniments, you can create a well-rounded, satisfying, and nutritious low-carb meal that complements the rich, cheesy flavors of the roll-ups perfectly.
FINAL THOUGHTS
This recipe is a fantastic choice for anyone looking for a quick, satisfying, and low-carb meal that doesn’t compromise on flavor. By avoiding common mistakes, using high-quality ingredients, and making small adjustments, you can achieve restaurant-quality results in your own kitchen. Whether you’re preparing this dish for family dinners, meal prepping, or entertaining guests, it’s a versatile and foolproof option that fits into various dietary preferences.
The ability to customize flavors, cheese types, and add-ins makes it adaptable to different tastes, ensuring everyone enjoys a delicious and nutritious meal. Additionally, pairing it with the right side dishes can further elevate the experience, making it even more enjoyable. Cooking at home not only allows for better control over ingredients and portion sizes, but it also creates a more wholesome and rewarding experience. Try this recipe today, experiment with different variations, and don’t forget to share your success with others!